


Build Your Own BandaDA Bird
Materials and Tools
● 3 Plastic bottles (~500 ml / 16.9 oz).
● Thick transparent tape (Scotch / packing tape).
● Double-sided tape (18 mm to 20 mm wide).
● Thin rope or cord (elastic or natural plant fiber, 1 m to 1.5 m long).
Avoid overly slick synthetic cords.
Creative Materials (Feathers & Finishes):
● Newspaper, EVA foam scraps, Kraft paper, or paper bread bags.
Any lightweight recycled material.
● Markers (permanent or whiteboard), crayons, or materials of choice
(dry leaves, plastic bags, etc.).
Tools:
● Box cutter / Utility knife.
● Scissors.
● Marker / Sharpie.

Phase One
Step One
Control Cord Installation
● Instruction: Take the first bottle (main body). Wrap the cord around the exact center of the bottle (halfway between the cap and the bottom) and tie 3 simple consecutive knots to secure it.
● Securing with tape: Cut a strip of clear tape (approx. 10 to 15 cm long). Place it over the cord around the bottle, ensuring the cord remains right in the middle of the tape strip.
● Workshop Tip: Apply the tape starting right next to the knot and go around the bottle, cutting it just before reaching the knot. The knot must remain completely uncovered to allow proper movement and pull tension.


Step Two
Cutting Guides on the Second Bottle
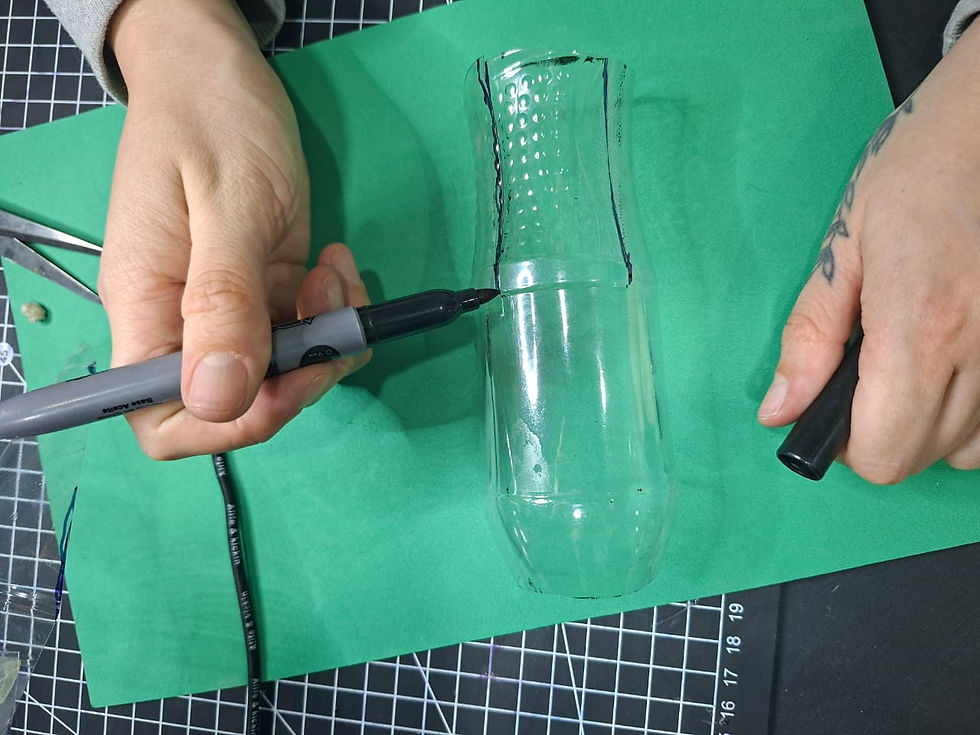
● Instruction: Take the second bottle and draw two opposing vertical lines using the marker to divide it in half (you can use the bottle's factory seam lines as a guide).
Then, mark two horizontal lines: one upper and one lower.
● Workshop Tip: For the upper line, leave a couple of centimeters before the cap, preserving the natural curvature of the bottle. For the lower line, mark right before reaching the hard plastic base.


Step Three
Removing Central Cylinder & Cutting Quarters
● Instruction: Lay the bottle flat on the table. Extend the utility knife blade minimally and make a safety puncture along the upper horizontal line (always pointing away from your hands).
● Cutting: Continue cutting along the horizontal lines using the utility knife or scissors to remove the top cap section and the base. Use scissors to cut along the vertical lines to create two equal pieces.
● Subdividing: Draw a middle line on each piece and cut them in half again to obtain 4 quarters of a bottle.


Phase Two
Step Four
Wing Construction and Shaping
● Instruction: Take two bottle quarters. Join them at their curved top ends using a strip of double-sided tape. You will notice that the plastic naturally forms an elbow-like joint curve.
● Shaping: Trim the outer ends with scissors to give them a stylized wing silhouette.
● Attachment Tab: Gently bend the inner end (the side attaching to the body) outward, opposing its natural curve, to create a flat mounting tab.


Step Five
Mounting Wings to the Body
● Instruction: Take the main body (Bottle 1). Position the wings on top.
Important: The wings must be placed diametrically opposite to the cord knot (the knot goes underneath/on the back).
● Fixing: Apply double-sided tape to the inner tab of each wing and stick them onto the body. Reinforce on top with clear tape to prevent them from detaching during movement.


Step Six
Tail Fabrication and Attachment
● Instruction: Take the third bottle and repeat the cutting process to get two halves. Take one half and cut it lengthwise into 3 equal strips. Trim their ends into points to simulate tail feathers.
● Joining: Join the 3 feathers together in a fan shape using double-sided tape at the base, creating a single unit. Apply double-sided tape underneath this tail unit and attach it to the lower rear part of the main body.


Step Seven
Head and Beak Shaping
● Instruction: Take the remaining half of the third bottle. On its rear section, make two lengthwise cuts halfway through (creating 3 flaps), leaving the front section intact.
● Attaching to the body: Open the flaps: place the center flap over the top wing attachment using clear tape, and wrap the two side flaps around the body underneath.
● Beak shaping: Take the front tip (where the cap used to be) and squeeze it inward by hand to form a cone or funnel shape. Secure the shape tightly with clear tape.


Phase Three
Step Eight
Preparing the Adhesive Surface
● Instruction: Strategically cover the body, wings, and tail with strips of double-sided tape. It is not necessary to cover 100%, but create horizontal gripping lines.


Step Nine
Feather Placement Techniques
● Instruction: Cut strips or feather shapes out of Kraft paper, newspaper, or paper scraps.
● Key Technique: Begin attaching feathers from back to front (moving from the tail toward the head). Layer them over one another at alternating 45° angles (like roof shingles). This adds volume, texture, and dynamic movement when the bird "flies."


Phase Four
Step Ten
Face, Beak, and Final Touches
● Instruction: Wrap the head area with paper or EVA foam. For the beak, cut a conical or folded piece out of EVA foam, place double-sided tape around the conical base of the head, and secure it.
● Customization: Draw the eyes, highlight edges with markers, add texture with crayons, or incorporate any additional recycled decorative elements.


Now... We take flight!
